

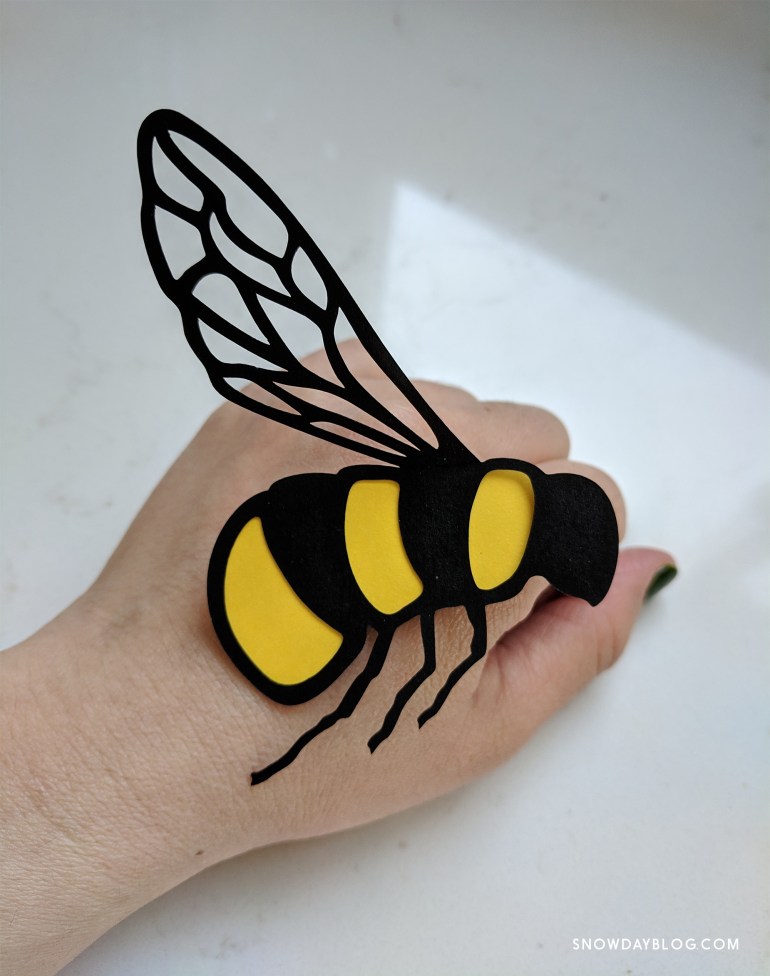
These Bee stickers with their lovely delicate wings are great for bee themed parties or for room decor. Create tiny ones for your scrapbook or use them to decorate a picture frame. I love the separate backings for these bees, which allows you to choose whatever color you want for their stripes. I chose to try gold as you can see below, but who says bees can’t be pink or even blue!

The Bee Stickers bundle includes 3 bee designs along with the backings which will allow you to create the yellow bands in the bees’ bodies.


Here are the materials you’ll need for this project:
Materials:
Cutting Machine
Cardstock Paper
Double Sided Tape
Adhesive for application
Here are the instructions on how to create your bee stickers…
Step 1: Cut out your bees
Cut out your bees and their backings. The bees bodies include dotted cut lines along the wing folds. Please note in your SVG file, the backings for the bees with two wings are the same, so you can use the same backing for any bee with two wings.

Step 2: Apply double-sided tape
Cut out some double-sided tape and place it along the black bands of each bee. I used double-sided tape with backing on it, but this isn’t necessary.

Step 3: Attach backing
Line up the back piece and attach it to the bee. When you create the bee with the single wing, make sure you’ve decided which direction it will face before attaching the backing.
Once the backing is attached, remember to fold the wings up so you get the 3D effect when you put them on your walls. And now you’re done! Easy right?


If you create these sweet bees, please remember to tag us on instagram at @chaivdesign. We love to see how you use them!


Pinterest Pins:


