

I started working on this DIY Halloween Bat about two weeks ago, and I’m so relieved it’s done because I came close to giving up a few times. Figuring out how to make it hang properly gave me more than a few grey hairs. Check out this pile of dead bat prototypes.

I recently had someone steal one of my older designs and sell it as their own. All the hours you put in creating something and for someone to callously copy and take advantage of it is just about enough to make me feel like quitting. I contacted them and asked them nicely to remove the item from their shop, and lucky for me they did it without a fight. I will never understand how someone can do that and still sleep at night, but unfortunately it happens all the time.
Back to bats…last year my 8 year old son told me I should design bats for Halloween, and I mumbled and sighed about it and told him I just didn’t have time and there were already so many bats out there. This year he asked me again and with the pandemic putting me in a different mindset, I thought: why the heck not?? This CHILD who is normally obsessed with video games is taking interest in my work so the least I can do is take his suggestion.
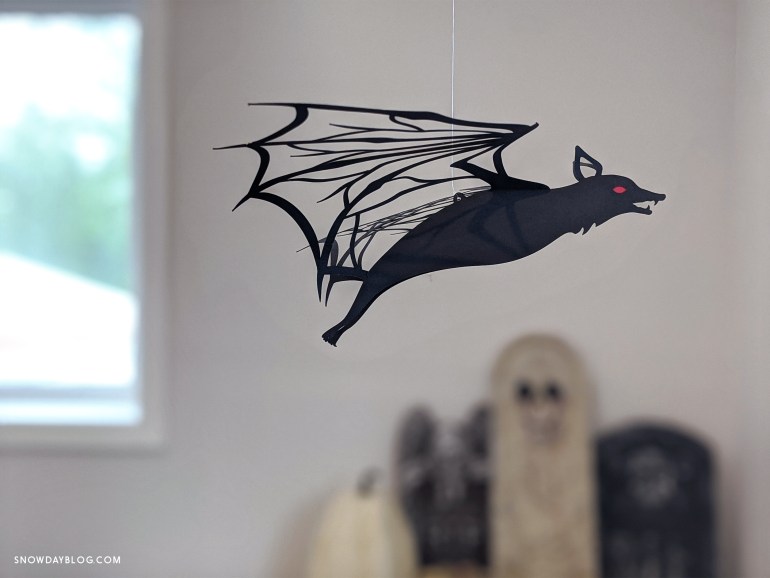
So this is the bat I came up with. Actually this is the bat we came up with together. The original bat had it’s mouth closed and my son sat with me while I was working on this bat and told me it would look scarier if I gave it an open mouth with fangs. He was right. And now he’s claiming 30% on all profits from this bat. I agreed to the 30% but I made him work for it by being my hand model in my photos.
This bat is pretty easy to make because you don’t need glue like my other designs. After it’s cut, you can probably make one bat in 5 minutes or less. You’ll really want to make more than one bat though because they look fantastic hanging together in a group.


Here is a link to purchase the Flying Bat design. Follow along with the tutorial below when you’re ready to make your bat.
❊❊❊ UPDATE SEPTEMBER 2021 ❊❊❊
A video tutorial for this bat is now posted on my YouTube channel. Click below to watch:
Here’s what you’ll need for this project:
✻✻✻ Disclosure: Some of the links below are affiliate links, meaning at no additional cost to you, I will earn a commission if you click through and make a purchase. I’m trying to avoid having ads on my site so if it’s a product you were planning on purchasing anyway, please consider purchasing through my links. I really appreciate your support❤️ ✻✻✻
Materials:
Cutting Machine
Cardstock Paper
Double-Sided Tape With Lining
X-Acto Knife or any sharp point
Clear String
Scissors

Step 1: Cut two bat cutouts
With your cutting machine, cut out two bats. In your cut file, you’ll see 2 bats which are mirror images of each other.

Step 2: Attach double-sided tape to one bat
Your bats should each have a dotted line cut at the base of their wings. Starting with one bat, reinforce this line by folding the wing in any direction. This will help with placement of the double-sided tape.


Place one piece of tape along the fold line, then place two more tape pieces on the bat’s neck and face.

Step 3: Attach second bat
Take your second bat and align it on top of the first, making sure they’re exactly aligned.

Once bats are aligned, hold down the bat’s head while lifting up the bat’s body to reveal the tape underneath. With your X-acto knife or any sharp object, peel off the tape liner. Then press down to secure.


Now open up the bat’s head to reveal the other two pieces of tape and remove the liners on both of them. Press down to secure.

Step 4: Attach back of wings to legs
Before we do this step, have a look at your bat’s legs and notice the notches on each leg. This is the area we’ll be working with in this step. The notches will help you with attaching the back of the wings to the legs.
This step may seem difficult because of how long it is, but I think it will help if you read through it first before starting. Once you read it through you’ll see it’s pretty simple.

On the tail end of each wing you’ll notice there are small rectangles. Cut out two pieces of double sided tape and place them on each rectangle. After you’ve placed tape on one rectangle, flip your bat over to place tape on the rectangle of the other wing.


Before you do anything else with this tape, open the bat’s wings by pressing on the shoulder area. You will be pulling on the wings a little in the next steps and this will make the wings more flexible.

Now with your bat’s head facing to the left, remove the tape liner on the one rectangle.

Now open the legs of the bat up, because you’re just working with the bat that’s in front. Take the rectangle and pull it down and behind the notch on the leg, without attaching it yet. Pull down and rotate the rectangle so that the top edge of the rectangle is parallel to the angle of the bat’s legs (see second image below).


Once you have the two edges parallel (as best you can), lower the rectangle down behind the notch until it completely disappears behind leg, but don’t stick it to the leg yet. At the same time make sure the notch is approximately center to the black bar on the wing, which we will call the “Wing Band”. As soon as the rectangle disappears, and you have the notch centered to the Wing Band, press the rectangle onto the leg.

Use the notch as a guide to center the “Wing Band”.

Turn the bat over and repeat with the rectangle on the other leg. When you’re done, the two rectangles should be “hidden” on the insides of the bat’s legs.


Step 5: Tie string to bat
Your bat assembly is now done. At this point if your bat’s wings have closed up, you can open them up again by pressing on the shoulders. Make sure you don’t fold the “Wing Band”.

Do not fold the Wing Band.
Next take your string and loop it through the two hanging notches.

Tie your first knot, making sure the knot sits in the crevice.

Tie two more knots if you’re using nylon string—I find three knots (in total) to be more secure than two. If you’re using different string then two knots may be enough.
If you’re using nylon string, give the string a gentle tug when you’re done tying the knots to straighten it out. Nylon string tends to hang to one side because the knot is so bulky it pushes the string over. Give it a few tugs until it hangs straight. If you can’t get it to straighten it’s ok. It may cause your bat to hang lopsided but you can adjust the wings to fix this.

Step 6: Open bat’s ears
Using your fingers, bend open each of the bat’s ears.


Step 7: Add red to bat’s eye (optional)
Cut a piece of red cardstock that is a little bigger than the bat’s eye. With your X-acto knife, or any small flat point, push the red paper between the bat’s head. If you enter from between the ears it’ll be easier to get between the two heads.

Once you get the red piece in, move it down to the eye until the eye is completely red. Make sure you’re using a flat object to push it down so you’re not separating the two heads. The red piece should stay in place without any tape or glue.


And you’re done! When you hang your bat, you can adjust the wings if it’s lopsided. You can even curl your bat’s wings down like in the image below and it should still hang nicely. Play around with the wings until you’re happy with the angle that the bat is hanging. I spent a lot of time making sure this bat design hangs properly, but it comes down to string type and whether or not the wings are opened up evenly.

I hope you enjoy my DIY Halloween Bat! Tag me on Instagram at @chaivdesign so I can see how you use your bats!


I loved the sophistication of this bat. One helpful hint for anyone who makes this bat: when I used card stock the wings drooped so I switched to what Michaels and Cricut call poster board and it worked perfectly. Thank you for the pattern.