Here is a sneak peak of all three mermaids together…

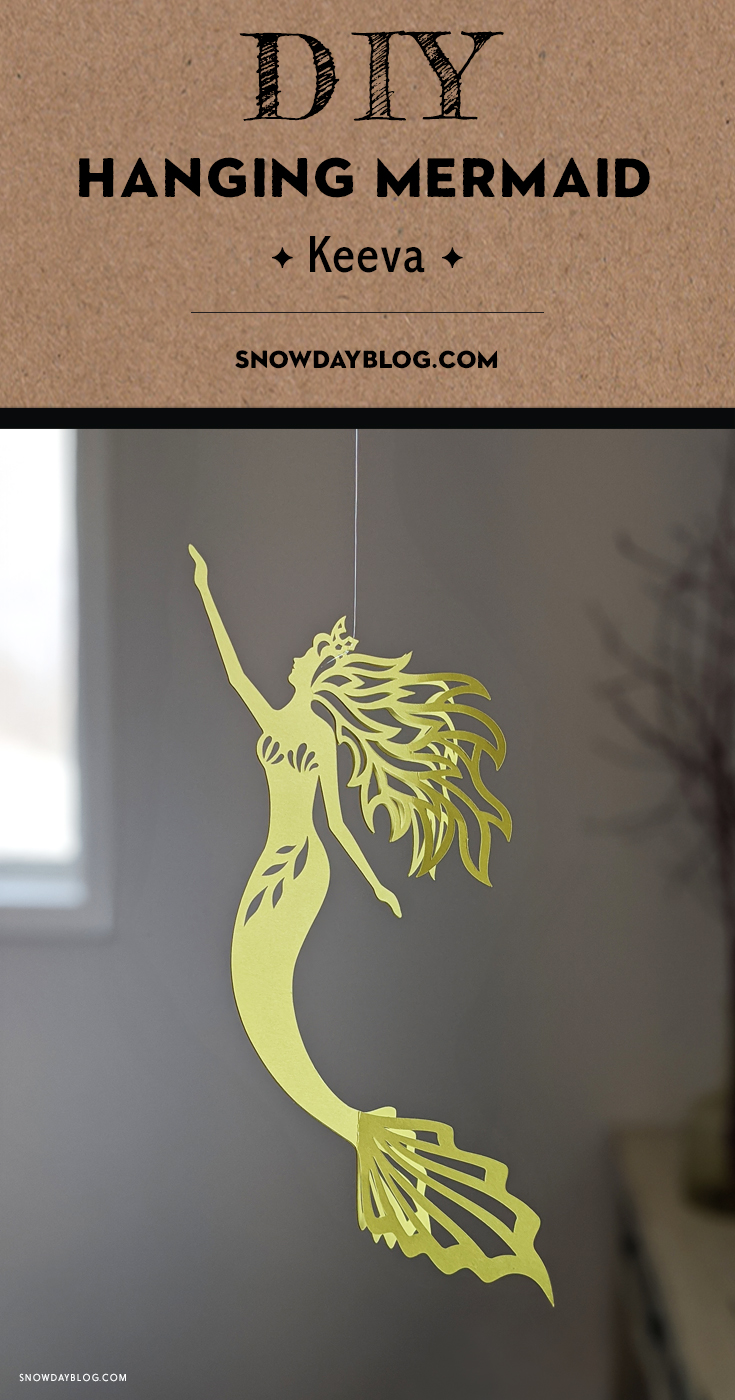
 You can purchase my Keeva mermaid here and follow along with the tutorial below.
✻✻✻ Disclosure: Some of the links below are affiliate links, meaning at no additional cost to you, I will earn a commission if you click through and make a purchase. I’m trying to avoid having ads on my site so if it’s a product you were planning on purchasing anyway, please consider purchasing through my links. I really appreciate your support! ✻✻✻
Materials:
Keeva Mermaid SVG
Cutting Machine
Cardstock Paper
Double Sided Tape With Lining
White Glue and Small Paintbrush
X-Acto Knife or any sharp point
Clear String
Scissors
❊❊❊ UPDATE MAY 2023 ❊❊❊
Video tutorial now available. Watch here:
You can purchase my Keeva mermaid here and follow along with the tutorial below.
✻✻✻ Disclosure: Some of the links below are affiliate links, meaning at no additional cost to you, I will earn a commission if you click through and make a purchase. I’m trying to avoid having ads on my site so if it’s a product you were planning on purchasing anyway, please consider purchasing through my links. I really appreciate your support! ✻✻✻
Materials:
Keeva Mermaid SVG
Cutting Machine
Cardstock Paper
Double Sided Tape With Lining
White Glue and Small Paintbrush
X-Acto Knife or any sharp point
Clear String
Scissors
❊❊❊ UPDATE MAY 2023 ❊❊❊
Video tutorial now available. Watch here:
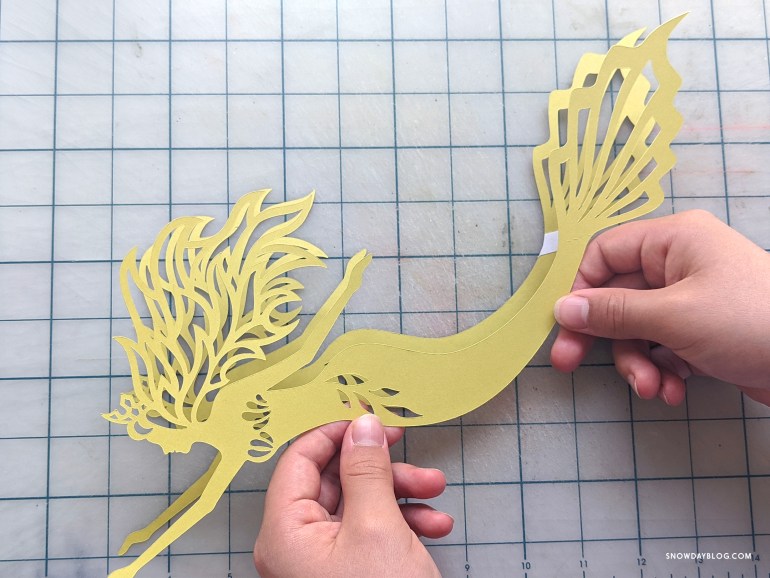
 You will notice your machine has also cut a dotted line below the mermaid’s tail. This will be the line you use to fold her tail open. In the image below the line looks solid because I’ve already folded the tail, but yours should be a cut dotted line.

Step 2: Attach double-sided tape along fold line of tail Using just one of your mermaids that you’ve cut, lay it flat on your work surface with her head to the left and her tail upwards. Cut a piece of double-sided tape about 1 inch long, and about a half inch wide. It’s important to use strong double-sided tape and not the removable tape for this step. Tape with liner on it works best and you’ll see why in the next steps. Place your tape along the fold line and let the excess hang off the edges of the mermaid’s tail.

Step 3: Trim off tape edges Flip your mermaid over and trim off the excess tape. Then flip her back over for Step 4.

Step 4: Attach two mermaids together In this step you’ll be using the taped area below the tail to attach the two mermaid cut-outs to each other. Take your second mermaid cut-out and align it on top of the one with the tape. Make sure all edges are aligned.
 Once you have them aligned, while holding them in place with one hand, open up the tail of the top mermaid to expose the tape beneath. With an X-acto knife or any sharp object, pry off and remove the tape liner. You won’t be needing the liner any more so you can discard it.
 Release the top mermaid tail back down and press on the tape area to secure the two mermaids together.

Step 5: Glue the two mermaids together For gluing I like to pour my glue into a container so I can easily dip my brush into it. I’m right-handed so for this step I have the mermaid’s head on my right side, tail on the left. Gently open the top mermaid all the way to the tail end and spread your glue on the bottom mermaid. It’s best to glue in sections, as in the images below, rather than doing the whole mermaid at once. You’ll be able to line them up better by gluing in sections. Spread glue on a small area and press down the top mermaid, making sure to keep the two mermaids aligned. Press down on the area you just glued to reinforce it, then open the top mermaid again to work on the next area, working your way towards the mermaid’s head.

 When you get to the head area, have a look at the image below to see where I end the glue at the mermaid’s hair. Apply glue to her chest and head area, leaving her hair unglued. Leaving the hair unglued will allow you to curl it open later. I also leave her arms to do last, after gluing her chest/head together first.
 Once you have the chest/head area glued together, just pry the arms open to apply glue and press them together.

Step 6: Open tail and curl hair Once the whole mermaid has been glued together, fold open the mermaid’s tail. You can place your fingers up against the fold lines to make sure the tail folds open along those lines.
 To curl the mermaid’s hair, use the end of a paintbrush or any cylindrical object like a pencil, and run it along the hair with your finger on the other side. If you’ve ever had to curl ribbon, it’s the same idea. You can also skip this curling and just gently open her hair with your fingers to leave it more straight.
 Her hair should end up similar to the image below.

Step 7: Tie string to mermaid Your mermaid is almost done. She just needs some string attached so she can be hung. Take the end of your fishing line or string and thread it through any of the holes in her crown. Then tie a knot two or three times.
 And that’s it! Your mermaid is ready to hang. I hope you enjoyed this one!

Follow my Instagram @chaivdesign to see upcoming new products and tag me if you post pictures. I love seeing how all my designs are used out there!