

Welcome to this new section of my blog called Magical Home. Here I’ll be sharing things I’m loving around my house. Anything from gardening to cooking, or kitchen gadgets to home decor—if I love it, I’ll share it with you here.
Today I’m showing you my bathroom makeover. It’s not a complete makeover, but what we did to it gave it a completely new atmosphere, and I LOVE it. A few weeks ago Photowall contacted me about doing a collaboration with them and I was elated, to say the least. I highly recommend you check out their website when you get a chance, even if it’s just to browse. They offer digitally printed wallpaper along with posters and canvas prints. All of these items are available with custom printing so you can actually upload your own image and have it printed as wallpaper or posters—how cool is that? If you’re inspired by anything you see and you decide to order with them, they’ve given me a 25% off coupon code to share with you: just enter snowdayblog25 when you check out. (Coupon expires on July 1, 2022)
I came across Photowall months ago through Instagram and I’ve had them at the back of my mind for our bathroom. We had previously replaced our bathroom window and the paint around the window trim peeled off, so it was a good time for a change for this wall. To be honest, this has been the state of our bathroom for over 2 years now so this collaboration with Photowall was the kick in the pants I needed to get this project done. The wall in this project is 8ft by 6ft.

The paint on this wall is a dark navy blue and the rest of the room is painted a slate color. When I was choosing my Photowall wallpaper I wanted to stick with something dark and dramatic. I love a dark accent wall, especially when the wall is small. Photowall’s selection of wallpaper is HUGE. By the time I was done going through their collection, I had favorited over 30 wallpaper choices. To help narrow my choices down, I asked my kids for help and together we chose Bali Blues.
One great feature of digitally printed wallpaper is that you can choose exactly what your wall will look like. During your ordering process you enter the dimensions of your wall and choose your wallpaper design, then the website shows you a small mock up of your wall with your wallpaper choice superimposed onto it. You then have the ability to move the wallpaper design around to your liking and where you place it is how it’ll be printed for you.
My wallpaper came printed on 45 cm wide strips (about 18 inches), each numbered with the order that they should be hung. We laid our strips out first to see what we would be working with.

I also got the Wallpaper Kit which includes everything you need—it was so nice to not have to round up these items.

To prep our wall my husband skim coated and sanded all the areas where paint had peeled off. I highly recommend this if you have paint that has peeled off, as it gets rid of the bumpy ridges of the paint layer which may show up through your wallpaper. We also removed all hardware on our wall, which was one electrical outlet cover and a towel hanging ring.


Once you’re ready to apply your wallpaper, Photowall has an instructional video tutorial on their website. Two issues came up for us that weren’t addressed in the video. The first is how to apply wallpaper around a window but luckily I was able to easily find Youtube videos on how to do this.
The second issue we ran into was that our panels were designed to be applied starting from the left side of the wall. Unfortunately with our window being on the left side and so close to the wall edge, this raised an issue. All the panels you place after the first panel will depend on the first panel being perfectly straight, and with having to cut around a window (and this being our first time working with wallpaper), we weren’t confident we could get the first panel perfectly straight. So we made the decision to start on the right side, where there was no obstruction to work around. If you scroll back up to the image with our panels laid out, you’ll see that the right most panel for us was a thin one, which wasn’t a problem but it had to be cut on the right edge. I did this with an X-acto knife and a long ruler over a cutting mat.
All this to say, if you have a window on your wall sitting less than 45 cm (or 18 inches) from the left edge of the wall, let the Photowall people know that you want to start your wallpaper application on the right side and they will print your panels accordingly.
The whole application took us a little over 3 hours, and here is the finished wall:
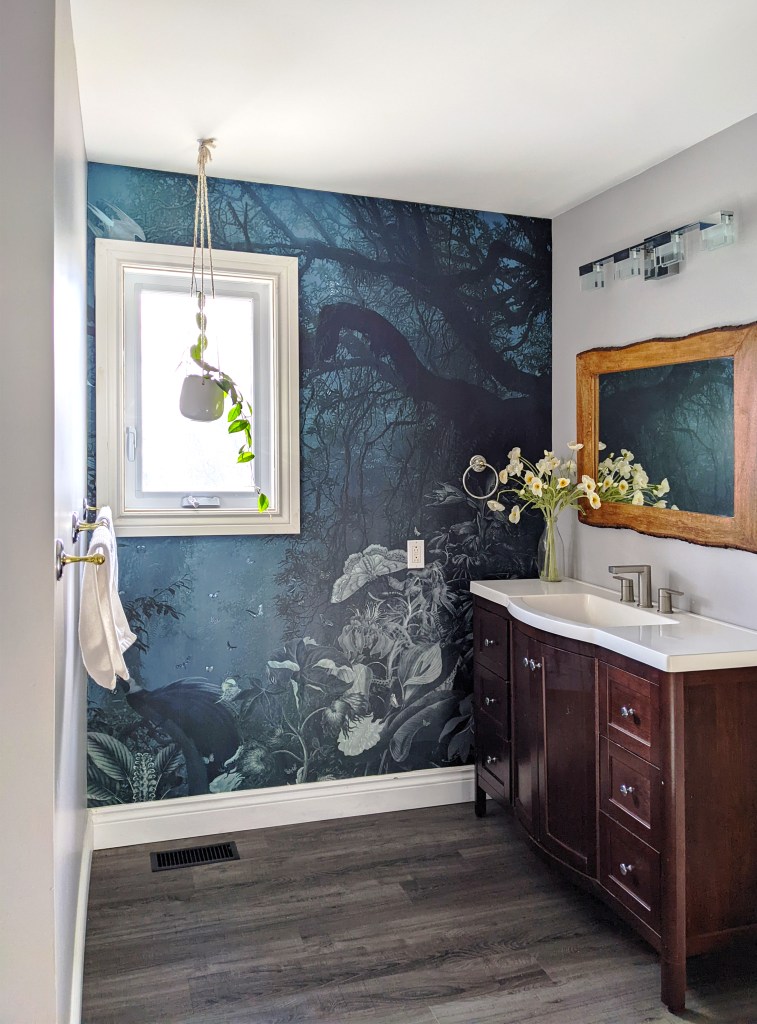


I love how it looks like a portal into a secret magical forest. I’ve always wanted a wall mural so I’m so happy we did this. The most challenging part of this project was cutting around the window, but if I can do it I know you crafty people reading this can do it too. We are building a custom home this summer and I already have plans for more wallpaper murals from Photowall.
Here’s a before and after:

And here’s a short video of the application:
I hope you enjoyed this first post in my Magical Home section. Head on over to Photowall if you have a project in mind or need any wall art for your home, and remember to use my coupon code snowdayblog25 to receive 25% off your order.
Follow me on Instagram and Pinterest @chaivdesign to see my daily posts and sneak peeks of upcoming designs. Thank you for all your support!